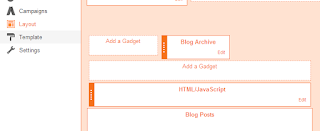
Below Instructions explain How to Add a Counter to a Blogger blog
Step1: Visit Blogger.com and log in to the Google email address an
d password associated with your Blogger account in the sign-in form on the right column.
Step2: Click the "Design / Layout" link in the menu row beneath the name of the blog to which you want to add a counter.
Step3: Click the "Add A Gadget" link in the section of the page where you want to add the counter. Typically, visitor counters go in the footer section, but Blogger allows you to place it in the side column and just below the header, as well. A pop-up window appears with a list of gadgets available to add to your Blogger blog.
Step4: Click the "Basics" tab in the left column, then click the "Blog's Stats" gadget title.
Step5: Type a name for your counter in the "Title Counter" field. The default name is "Total Pageviews," but you can change it to whatever you prefer. If you don't want your counter to have a title, leave this field blank.
Step6: Select from the drop-down menu under "Time Period" the length of time you want your counter to display the visitor count for. You can choose to display your blog's all-time visitor count, or the number of people who have visited your blog in the last week or month.
Step7: Click the radio buttons next to the style and style options you want your counter to have.
Step8: Click the orange "Save" button in the lower right corner of the pop-up window. This saves the selections you made for the counter, and also closes the gadget settings' pop-up window.
Step9: Click the orange "Save" button in the upper right corner of your blog's design dashboard to make the changes permanent and display the counter on your blog.


0 comments:
Post a Comment