Showing posts with label Blogger Widget. Show all posts

Monday, September 19, 2016

How To Install Multi-Tab Widget In Blogger Sidebar


One benefit of this widget is that if my anyone had added too many widgets in the sidebar, then by installing multi tab is going to save the placement of widgets in the sidebar column which usually extends downward.

The placement of each widget in the sidebar can be a buddy for some columns that will make your blog become more look neat and attractive. Immediately, the way it is applied as follows,follow below instructions.

Bellow are Instructions To Follow:

Go To Blogger Dashboard→Your Blog
Template→Edit HTML tab
Find anywhere in the template ]]></b:skin> or </style> by pressing (Ctrl+F)

Step No.1:
This step includes a CSS code that you have to insert it before the closing tag ]]></b:skin> and save your template.
-----------------COPY THID CODE-------------------------------------------------------------

/* MultiTab Sidebar Widget By www.BloggersStanD.com */

.bsd-tab-area {
  display: inline-block;
  text-transform: uppercase;
  width: 100%;
}

.bsd-tab-area p {
  display: inline-block;
  background: #fff;
  text-transform: lowercase;
  font-size: 14px;
  padding: 20px;
  margin: 0;
}

.bsdmultitab-gadget {
  list-style: none;
  margin: 0 0 10px;
  padding: 0
}

.bsdmultitab-gadget li {
  list-style: none;
  padding: 0;
  margin: 0;
  float: left
}

.bsdmultitab-gadget li a {
  background: #8ED557;
  color: #fff;
  display: block;
  padding: 15px;
  font-size: 12px;
  text-decoration: none
}

.multitabs-bsd {
  width: 33.3%;
  text-align: center
}

.bsd-tab-area h2,
.bsd-tab-area h3,
.bsd-tab-area h4,
.bsd-tab-area h5,
.bsd-tab-area h6 {
  display: none;
}

.bsdmultitab-gadget li a.bsdmultitab-gadget-current {
  padding-bottom: 20px;
  margin-top: -8px;
  background: #fff;
  color: #333;
  text-decoration: none;
  border-top: 3px solid #8ED557;
  font-size: 13px;
  text-transform: uppercase
}

----------------------------------------------------------------------------------------------------

Step No.2:

This step includes a JQuery code and you have to put this code above </body> tag.

---------------------------COPY THIS CODE ----------------------------------------------------

<script type='text/javascript'>
//<![CDATA[
// Multitabs Sidebar by www.BloggersStanD.com
jQuery(document).ready(function($){ $(".bsdmultitab-gadget-content-widget-id").hide(); $("ul.bsdmultitab-gadget-content-tabs-id li:first a").addClass("bsdmultitab-gadget-current").show(); $(".bsdmultitab-gadget-content-widget-id:first").show(); $("ul.bsdmultitab-gadget-content-tabs-id li a").click(function() { $("ul.bsdmultitab-gadget-content-tabs-id li a").removeClass("bsdmultitab-gadget-current a"); $(this).addClass("bsdmultitab-gadget-current"); $(".bsdmultitab-gadget-content-widget-id").hide(); var activeTab = $(this).attr("href"); $(activeTab).fadeIn(); return false; }); });
//]]>
</script>

-------------------------------------------------------------------------------------------------------

Step No.3:
After this you have almost done your plugin for a new look.Just a simple step is requied to insert this plugin to your blog you have to insert HTML code just below
<div id = 'sidebar-wrapper'>

----------------------------COPY THIS CODE ----------------------------------------------
<div class='bsd-tab-area'>
<ul class='bsdmultitab-gadget bsdmultitab-gadget-content-tabs-id'>
<li class='multitabs-bsd'><a href='#multicolumn-widget-id1'>Trending</a></li>
<li class='multitabs-bsd'><a href='#multicolumn-widget-id2'>Category</a></li>
<li class='multitabs-bsd'><a href='#multicolumn-widget-id3'>Archive</a></li>
</ul>
<div class='bsdmultitab-gadget-content bsdmultitab-gadget-content-widget-id' id='multicolumn-widget-id1'>
<b:section class='sidebar' id='sidebartab1' preferred='yes'/>
</div>
<div class='bsdmultitab-gadget-content bsdmultitab-gadget-content-widget-id' id='multicolumn-widget-id2'>
<b:section class='sidebar' id='sidebartab2' preferred='yes'/>
</div>
<div class='bsdmultitab-gadget-content bsdmultitab-gadget-content-widget-id' id='multicolumn-widget-id3'>
<b:section class='sidebar' id='sidebartab3' preferred='yes'/>
</div>
</div>

-------------------------------------------------------------------------------------------------

Note: Change the name of the widget title that labeled a mark red on the code above in accordance with a buddy widget title. Save your template and see the results.


I hope this helped you. Leave comment for us.
Read More

How To Add Multi Tab Sidebar Widget In Blogger

One benefit of this widget is that if my anyone had added too many widgets in the sidebar, then by installing multi tab is going to save the placement of widgets in the sidebar column which usually extends downward.
The placement of each widget in the sidebar can be a buddy for some columns that will make your blog become more look neat and attractive. Immediately, the way it is applied as follows,follow below instructions.

Bellow are Instructions To Follow:

Go To Blogger Dashboard→Your Blog
Template→Edit HTML tab
Find anywhere in the template ]]></b:skin> or </style> by pressing (Ctrl+F)

Step No.1:
This step includes a CSS code that you have to insert it before the closing tag ]]></b:skin> and save your template.
-----------------COPY THID CODE-------------------------------------------------------------

/ * Multi Tab Widget * /.multitab-section {background: # fff; text-transform: uppercase; width: 100%}.multitab-widget {list-style: none; margin: 0 0 10px; padding: 0}.multitab-widget li {list-style: none; padding: 0; margin: 0; float: left}.multitab-widget li a {background: # 22a1c4; color: # fff; display: block; padding: 15px; font-size: 13px; text-decoration: none}.multitab-tab {border: 0; width: 33.3%; text-align: center}.multitab-section h2, h3 .multitab-section, .multitab-section h4, h5 .multitab-section, .multitab-section h6 {display: none;}.multitab-li widget solid # 22a1c4; font-size: 14px; text-transform: capitalize}

----------------------------------------------------------------------------------------------------

Step No.2:

This step includes a JQuery code and you have to put this code above </body> tag.

---------------------------COPY THIS CODE ----------------------------------------------------

<Script type = 'text / javascript'>
// <! [CDATA [
// Multi tab widget
jQuery (document) .ready (function ($) {$ (". multitab-widget-content-widget-id"). hide (); $ ("ul.multitab-widget-content-tabs-id li: first a ") .addClass (" multitab-widget-current "). show (); $ (". multitab-widget-widget-content-id: first '). show (); $ ("ul.multitab-widget-content -tabs-id li a "). click (function () {$ (" ul.multitab-widget-content-tabs-id li a "). removeClass (" multitab-current widget-a "); $ (this) .addClass ("multitab-widget-current"); $ (". multitab-widget-content-widget-id"). hide (); var activeTab = $ (this) .attr ("href"); $ (activeTab ) .fadeIn (); return false;});});
//]]>
</ Script>

-------------------------------------------------------------------------------------------------------

Step No.3:
After this you have almost done your plugin for a new look.Just a simple step is requied to insert this plugin to your blog you have to insert HTML code just below 
<div id = 'sidebar-wrapper'>

----------------------------COPY THIS CODE ----------------------------------------------
<Div class = 'multitab-section'>
<Ul class = 'multitab multitab-widget-widget-content-tabs-id'>
<Li class = 'multitab-tab'> <a href='#multicolumn-widget-id1'>Latest</a> </ li>
<Li class = 'multitab-tab'> <a href='#multicolumn-widget-id2'>Tags</a> </ li>
<Li class = 'multitab-tab'> <a href='#multicolumn-widget-id3'>Archive</a> </ li>
</ Ul>
<Div class = 'multitab-widget-content multitab-widget-widget-content-id' id = 'multicolumn-widget-ID1'>
<B: section class = 'sidebar' id = 'sidebartab1' preferred = 'yes' />
</ Div>
<Div class = 'multitab-widget-content multitab-widget-widget-content-id' id = 'multicolumn-widget-ID2'>
<B: section class = 'sidebar' id = 'sidebartab2' preferred = 'yes' />
</ Div>
<Div class = 'multitab-widget-content multitab-widget-widget-content-id' id = 'multicolumn-widget-id3'>
<B: section class = 'sidebar' id = 'sidebartab3' preferred = 'yes' />
</ Div>
</ Div>

-------------------------------------------------------------------------------------------------

Note: Change the name of the widget title that I put a mark red on the code above in accordance with a buddy widget title. Save your template and see the results.


I hope this helped you.
Read More

Wednesday, August 31, 2016

Stylish Related Posts Widget with Thumbnail for Blogger

Related posts widget with thumbnail for blogger – this is a wonderful widget to display the related posts in the footer of each blog post from the same category along with image thumbnail. By installing this widget in a blog, not only help to display the relevant posts, but also can increase the blog page-view and reduce bounce rate as well. This a wonderful hack to remain your readers for long periods which is very important for your blog. Mostly third party professional blogger templates already included this feature. But the blogger default templates don’t have this feature. So, if you are using the blogger default or a template which don’t have related posts widget and you’re looking to include this feature in your blog. Here’s a stylish related posts widget with thumbnail for blogger ready to install in your blog.


How to add related posts widget with thumbnail in blogger

To make this widget you need the knowledge of JavaScript and CSS languages, but don’t worry in this post we are going, to add this through already written code, so, you don’t need to write code but only follow the below simple steps to add this important feature in your blog.
  • Sign into your Blogger account
  • Go template
  • Download the Bach up your template, as a precaution if you make any mistake in editing template then you’ll recover from backup.
  • Click the Edit HTML tab and search </ head>
  • Now click on below “view code” button. Copy the code from appearing pop-up window and paste the just above the </ head> tag.
  • After the adding above code, then scroll down and search <div class='post-footer'>Paste the below code just above it.
<!-- Related Posts with Thumbnails Code Start-->
 <b:if cond='data:blog.pageType == &quot;item&quot;'>
 <div id='related-posts'>
 <b:loop values='data:post.labels' var='label'>
 <b:if cond='data:label.isLast != &quot;true&quot;'>
 </b:if>
 <b:if cond='data:blog.pageType == &quot;item&quot;'>
 <script expr:src='&quot;/feeds/posts/default/-/&quot; + data:label.name + &quot;?alt=json-in-script&amp;callback=related_results_labels_thumbs&amp;max-results=6&quot;' type='text/javascript'/></b:if></b:loop>
 <script type='text/javascript'>
 var currentposturl=&quot;<data:post.url/>&quot;;
 var maxresults=5;
 var relatedpoststitle=&quot;Related Posts&quot;;
 removeRelatedDuplicates_thumbs();
 printRelatedLabels_thumbs();
 </script>
 </div><div style='clear:both'/>
 </b:if>
 <!-- Related Posts with Thumbnails Code End-->

Customization

 maxresults = 5 ; to change the number of related posts.
” Related Posts “; to change the title of this widget.
Save the template and check the results.
Hopefully, it will be working in  the blog.  However, if you are facing any trouble about the adding related posts widget, then share with us in the comment section.
Read More

Tuesday, August 23, 2016

Create A Colorful Latest Posts Widget

If you like to add a colorful latest posts widget, then install this one. This is an amazing widget which will show a collection of the latest articles in your blog sidebar with beautiful five different colors, which will attract the visitor’s attention.


<style scoped="scoped">
#ptb-repost {
font:normal normal 11px/normal Arial;
color:#333;
margin:0 auto;
padding:0;
min-height:100px;
background:transparent url('https://blogger.googleusercontent.com/img/b/R29vZ2xl/AVvXsEh_hNCWjWlGBsisYIZzbwRqjBGXdefQ4MwOo-zEe6SO-juqtgAavnBN3Nf719PqHy6nzumoUOiqCXTytO8HTyGaSpVbReK6C6zdxmpmd7rr-5xYwjaFDTlzx_5NxKvTsv1WilVGjBl6VTg/s1600/loading.gif') no-repeat 50% 50%;
}
#ptb-repost li {
list-style:none;
margin:0;
padding:8px;
background-color:white;
border-bottom:1px solid #ddd;
}
#ptb-repost li a img:hover {
-webkit-transform: scale(1.1, 1.1);
-moz-transform: scale(1.1, 1.1);
-ms-transform: scale(1.1, 1.1);
-o-transform: scale(1.1, 1.1);
transform: scale(1.1, 1.1);opacity: 0.5;
}
#ptb-repost li a img {
float:left;
margin:0 10px 0 0;
padding:0;
border:none;
background:none;
outline:none;
}
#ptb-repost li a.title {
font:normal normal 12px/normal Oswald;
display:block;
text-decoration:none;
color:#fdfdfd;
}
#ptb-repost li a.title:hover {
text-decoration:none;
color:#ffffff;
}
#ptb-repost li:nth-child(1) {background-color:#E11E28;margin-right:0%}
#ptb-repost li:nth-child(2) {background-color:#FD3C03;margin-right:0%}
#ptb-repost li:nth-child(3) {background-color:#FECB09;margin-right:0%}
#ptb-repost li:nth-child(4) {background-color:#6EBE27;margin-right:0%}
#ptb-repost li:nth-child(5) {background-color:#149A48;margin-right:0%}
#ptb-repost li:nth-child(6) {background-color:#5BBFF1;margin-right:0%}
#ptb-repost ul li:nth-child(7) {background-color:#61469C;margin-right:0%}
#ptb-repost ul li:nth-child(8) {background-color:#863E86;margin-right:0%}
#ptb-repost li:nth-child(9) {background-color:#863E62;margin-right:0%}
#ptb-repost li:nth-child(10) {background-color:#815540;margin-right:00%}
</style>
<ul id="ptb-repost"></ul>
<script>
//<![CDATA[
var rp_homePage = "http://guidelinks.blogspot.com/",
    rp_numPosts = 5,
    rp_thumbWidth = 50,
    rp_numChars = 80,
    rp_sortByLabel = false,
    rp_noImage = "https://blogger.googleusercontent.com/img/b/R29vZ2xl/AVvXsEjz3-02OenOk5DvWDIiFq9Wlw3jDRePO6dMvFDLr7e1WoMUijrxM8wpsXI1YA1yr7dl-xD67u70su0GC9fX1r9HbqV6Gx2JS2JX8g88GfNObGqBMYrArCPn9qbuf2jC0T4bl2vLfjgZYzw/s1600/minismallest-img.png",
    rp_newTabLink = false,
    rp_loadTimer = "onload";
//]]>
</script>
<script src='https://mas-aldi.googlecode.com/svn/trunk/js/rp-warna-warni.js' type='text/JavaScript'></script>

How to go about creating recent post widget in blogger blog.
    Read More

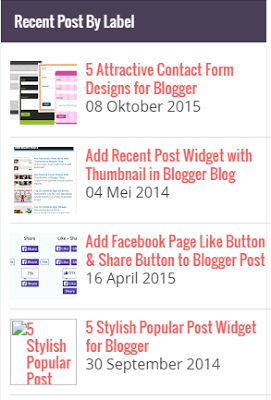
    How to Create Recent Posts Widget By Label

    The bellow widgets show all latest posts in the blog. If you want to display the particular label posts in your blog sidebar then add the below code on your blog.
    <style>
    /*Recent Post By tag*/
    img.rct-thumb{float:left;margin-right:10px;height:72px;width:72px;}
    .recent-by-tag{width:100%;margin:0;padding:0}
    ul.recent-by-tag li{padding:10px 0;margin-bottom:0;border-bottom:1px solid #ddd}
    .recent-by-tag li{font-size:13px;list-style:none;padding-left:0;margin:0;padding:0;overflow:hidden}
    .recent-by-tag a{font-family:'Oswald',sans-serif;font-size:16px;font-weight:normal;margin:0;}
    .recent-by-tag strong{padding-left:0}
    span.showdates{font-size:16px;margin:10px 0 0}
    </style>
    <script type='text/javascript'>
    var numposts = 5;
    var showpostthumbnails = true;
    var showpostdate = true;</script>
    <script type='text/javascript'>
    //<![CDATA[
    // Recent Post By Tag
    // Recent Post By Tag For Blogger by Kang Mousir
    // http://gplus.to/mousir - http://kang-mousir.blogspot.com
    function rcentbytag(e){document.write('<ul class="recent-by-tag">');for(var t=0;t<numposts;t++){var n=e.feed.entry[t];var r=n.title.$t;var i;if(t==e.feed.entry.length)break;for(var o=0;o<n.link.length;o++){if(n.link[o].rel=="replies"&&n.link[o].type=="text/html"){var u=n.link[o].title;var f=n.link[o].href}if(n.link[o].rel=="alternate"){i=n.link[o].href;break}}var l;try{l=n.media$thumbnail.url}catch(h){s=n.content.$t;a=s.indexOf("<img");b=s.indexOf('src="',a);c=s.indexOf('"',b+5);d=s.substr(b+5,c-b-5);if(a!=-1&&b!=-1&&c!=-1&&d!=""){l=d}else l="https://blogger.googleusercontent.com/img/b/R29vZ2xl/AVvXsEg3nmM6hCMoD_CvoO4-xyn1zytfGicF1Hk3K5Y-rLkBlbbLUzikn087N6t2eNLdFg6aF_m_YzXr7LQ9vFHD5OOtXOFfzYmXflrjV0GXCkhIdgSJGgg4hbuZ9xLDbwPzq93CupWa4nx6rWdC/s70-c/KM+Icon.png"}var p=n.published.$t;var v=p.substring(0,4);var m=p.substring(5,7);var g=p.substring(8,10);var y=new Array;y[1]="Januari";y[2]="Februari";y[3]="Maret";y[4]="April";y[5]="Mei";y[6]="Juni";y[7]="Juli";y[8]="Agustus";y[9]="September";y[10]="Oktober";y[11]="November";y[12]="Desember";document.write('<li class="clear">');if(showpostthumbnails==true)document.write('<a href="'+i+'" target ="_blank" title="'+r+'"><img class="rct-thumb" alt="'+r+'" src="'+l+'"/></a>');document.write('<strong><a href="'+i+'" target ="_blank" title="'+r+'" rel="nofollow">'+r+'</a></strong>');document.write('<br>');var x="";var T=0;if(showpostdate==true){x='<span class="showdates">'+x+g+" "+y[parseInt(m,10)]+" "+v+"</span>";T=1}document.write(x);document.write("</li>");if(t!=numposts-1)document.write("")}document.write("</ul>")}
    //]]>
    </script>
    
    <script>
    document.write("<script src=\"http://guidelinks.blogspot.com/feeds/posts/default/-/Widget?orderby=updated&alt=json-in-script&callback=rcentbytag\"><\/script>");
    </script>
    
    
    Read More

    Create Recent Posts Without Thumbnails

    The bellow all widgets will display image thumbnails. Which will increase the load time of your blog. If you don’t want to make your blog too heavy then install this one. This a simple widget which only displays the latest article titles only.

    Read More

    Create Gallery Recent Post To Your Blog

    If you want to disply gallery to your blog then install  this widget which will create a beautiful gallery in your blog sidebar from recently published posts with attractive CSS effects. With the help of this can get the visitors attention and your blog will get more pageviews.


    Read More

    Create Slider Recent Post

    This very nice and stylish widget which will increase your blog look. This widget will collect your latest posts and it will show as a slideshow. Which will attract the visitor’s attention and you will notice the increasing your blog page views dramatically. For better result , I will suggest you install this widget just below the header.

    Copy bellow codes and paste to your gadget/widget added
    Read More

    Monday, August 22, 2016

    Add Recent Posts With Page Navigation

    This very amazing widget and beautiful design. It will display the latest post with image thumbnails in your blog’s sidebar. I suggest you to install the widget on your blogger blog because it will allow visitors to see the wide list of latest posts with the help of its page navigation and also has responsive and SEO friendly design
    Read More

    How To Add Recent Post Widget with Thumbnail in Blogger Blog

    Recent posts widget also an important widget like related post for any blog or website. With the help of this widget, we can display our blog latest posts in the blog’s sidebar, which helpful for your blog regular visitors, they can easily find  recently published post on your blog. In this post I want to tell how to add latest post widget with thumbnail in blogger blog. If you are interesting to add this widget in your blog, then follow this tutorial which help you for adding this feature in your blog.

    Why you Need to Add Latest Post widget in your blog?
    There are many benefits of this widget, this the way to display fresh and new contain in blog sidebar it inform your blog visitor which post recently published in your blog. It also gives a great look to your blog and also help to increase your blog page preview. So it is very important widget for any blog or website.

    How to Add Recent Post Widget with Thumbnail in Blogger Blog
    First login your blogger account and select layout from drop menu.

    Now add a new gadget and select HTML/JAVASCRIT and paste the below code and check result.

    <style type=’text/css’>
    img.recent_thumb {width: 90px;height: 70px;float: left;
    margin-right: 10px;}.recent_posts_with_thumbs {float: left;width: 100%;min-height: 70px;margin: 5px 0px 5px 0px;padding: 0;font-size:12px;}
    ul.recent_posts_with_thumbs li {padding-bottom:5px;padding-top:5px;min-height:65px;} .recent_posts_with_thumbs a {text-decoration:none;} .recent_posts_with_thumbs strong {font-size:10px;}</style><script style=’text/javascript’ src=’https://googledrive.com/host/0BzPgmXeCwsMRcmlNOHhtaDNNMjA’></script><script style=’text/javascript’>
    var numposts = 5;
    var showpostthumbnails = true;
    var displaymore = false;
    var displayseparator = false;
    var showcommentnum = false;
    var showpostdate = false;
    var showpostsummary = true;
    var numchars = 50;</script>
    <script src=’/feeds/posts/default?orderby=published&alt=json-in-script&callback=showrecentpostswiththumbs’></script>
    <hr/>

    If you don’t want to display thumbnail and want only show title and description then replace var showpostthumbnails = true; with var showpostthumbnails = false;
    50 this the description characters amount you can chanage that if you need.
    5 this amount of posts you can change that if you wish.


    How to go about creating recent post widget in blogger blog.
    
    
    1. First of all, choose your favorite widget from above then click on view code button and copy all codes from the appearing pop-up window.
    2. Login your blogger account
    3. Go layout and add new gadget
    4. Select HTML/JavaScript and paste all code here.
    5. Save the gadget
    
    Settings/Configuration
    
    
    • blogURL Fill with your blog URL
    • var numPosts Fill with the number of articles you want to display
    • var showpostthumbnail Select true if you want image thumbnail and false to eliminate
    • var showpostdate Select true if you want show date and false to eliminate
    • bloggertips Please replace with the desired label, when more than two words to use % instead of spaces (only for widget # 5)
    I hope your done!

    You can place your comment in below the comments box.
    Read More

    Friday, August 19, 2016

    Redirect Blogger 404 Error Page (Page Not Found) To Homepage

    Most of the Bloggers starts their blog from Blogger Platform and starts posting number of articles.

    Sometime, you may have changed the URL, then indexed URL on search engines forward visitors to the old URL, this automatically redirects to the 404 page.

    Sometime, it may also happen when the visitors misspelled the URL.

    When you have a popular blog this make negative impression to the blogs because of not clicking back and homepage button and leaves the site forever. Now we have to redirect 404 Error page to Homepage and this will make the good impression and greatest potential  users of our blog.


    How to redirect 404 Error page to Homepage?

    Step 1:- First Go to Blogger Dashboard >> Setting >> Search Preference >> Custom Page Not Found.


    Step 2:- Now copy the below code to the Empty Box.

    Sorry, the page you're looking for in this blog does not exist.
    You will be redirected to homepage shortly.
    <script type = "text/javascript">
    BSPNF_redirect = setTimeout(function() {
    location.pathname= "/"
    }, 7000);
    </script>
    now click on save changes.

    Note:-

    In my case, I have used 7000, which means you will be redirected to Homepage in 7 seconds.
    Read More

    How To Add Customize Scroll Bar in Your Blogger Blog (Blogspot widget)


    Nowadays Blogger blog (or blogspot) is the most popular blog designing platform provided by Blogger. Most of the blogger begins with the blogger blog for sharing and for many purpose by posting into their blog.

    And all of us blogger wants to decorate our blog very beautifully, so visitors and people can be attracted. Many bloggers have seen many customized scroll bar in popular blog and wants to customize their blog with beautiful scrollbar,but dont know how to do? 

    So, Today i am here to share Customizable Scrollbar script for the blogger. Hope this tip or customizable scrollbar you will like, And it is very quick and easy to customize the colors, size (width and height). This can be done by adding script (Which is given at the middle of the post) into the CSS code. 

    Lets customize the Scroll bar.

    • First Go to Blogger Dashboard.
    • Now click on template >> Edit HTML.
    • Now search for this code ]]></b:skin> using ctrl+f button.
    • Now Copy the Below code and just paste above ]]></b:skin> .

    /* startingphaseofc.blogspot.com scrollbar effect */ ::-webkit-scrollbar { width:8px; height:6px; } ::-webkit-scrollbar-track { -webkit-box-shadow: inset 0 0 4px rgba(0,0,0,0.3); background:#eee; } ::-webkit-scrollbar-thumb { background: rgba(28,119,229,0.7); -webkit-box-shadow: inset 0 0 6px rgba(0,0,0,0.5); } ::-webkit-scrollbar-thumb:window-inactive { background: rgba(116,188,99,0.5);

    • Now click on save template and its done.

    OR you also can do this with following method.

    • First go to Blogger dashboard.
    • And click on Template >> Customize button.
    • Now click on Advance >> Add CSS and you will see 'Add custom CSS' and box now just paste above code.
    • Now click on Apply to Blog Button and its done.

    NOTE:

    You can change the color by changing #eee and width and height by changing width:8px; height:6px; with your desired size.
    Read More

    How to Add an Alexa Ranking Widget in website or Blog

    Alexa Ranking is only one factor now, That decides the how popular your blog or website is.

    So why is Alexa rank important? Alexa is a competitive intelligence tool that is used to measure and compare your website with competitors and shows the global traffic rank for a website. The ranking number helps advertisers to analyze the marketing capacity of your website. If you have a good ranking in Alexa then these advertisers will be ready to buy an ad space on your website for a really high price.
    Alexa Ranking Widget
    To Increase Alexa Raking of your websites there are Different Ways, One of those way is to embed the alexa Ranking button to the blog and websites.

    1. How to Add an Alexa Ranking to the Blog or Websites?

    Here I have listed HTML code which you need to add to your websites or blog. There are three different sizes.

    Alexa Site Status Button
    It shows your website rank with total number of links.

    120 X 95
    <a href="http://www.alexa.com/siteinfo/askmebyte.com"><script type="text/javascript" src="http://xslt.alexa.com/site_stats/js/s/a?url=askmebyte.com"></script></a>
    120 X 240 
    <a href="http://www.alexa.com/siteinfo/askmebyte.com"><script type="text/javascript" src="http://xslt.alexa.com/site_stats/js/s/b?url=askmebyte.com"></script></a>
    468 X 60
    <a href="http://www.alexa.com/siteinfo/askmebyte.com"><script type="text/javascript" src="http://xslt.alexa.com/site_stats/js/s/c?url=askmebyte.com"></script></a>


    Alexa Site Ranking Button
    It shows your website rank.

    120 X 65
    <a href="http://www.alexa.com/siteinfo/askmebyte.com"><script type="text/javascript" src="http://xslt.alexa.com/site_stats/js/t/a?url=askmebyte.com"></script></a>
    120 X 90 
    <a href="http://www.alexa.com/siteinfo/askmebyte.com"><script type="text/javascript" src="http://xslt.alexa.com/site_stats/js/t/b?url=askmebyte.com"></script></a>
    468 X 60
    <a href="http://www.alexa.com/siteinfo/askmebyte.com"><script type="text/javascript" src="http://xslt.alexa.com/site_stats/js/t/c?url=askmebyte.com"></script></a>

    Now you have to replace askmebyte.com with your website name and its done!!!!
    Read More

    How to add Recent post widget/gadget in blogger blog.

    How to add Recent post widget/gadget in blogger blog.

    • Log into Blogger.com
    • Go to Blogger Dashboard.
    • Click on Layout
    • Than Click on Add a Gadget.


     5 Type of Recent Post Widget Blogger Widgets/Gadgets
     5 Type of Recent Post Widget Blogger Widgets/Gadgets

    • Now choose html/Javascript .
    • Now copy paste your desired code from below.

     5 Type of Recent Post Widget Blogger Widgets/Gadgets
     5 Type of Recent Post Widget Blogger Widgets/Gadgets


    Scrolling/Ticker Recent Post Widget


    It is a scrolling recent post widget for blogger blog.this recent post widget with thumbnails will show images on the right hand side and post titles in the left side with details or snippets.there are lots of options for customization if you want.i think it is the best animated recent post widget with thumbnails.
     5 Type of Recent Post Widget Blogger Widgets/Gadgets
     5 Type of Recent Post Widget Blogger Widgets/Gadgets
    <style>img.recent_thumb {padding:1px;width:55px;height:55px;border:0;float:right;margin:0 0 5px 10px;}.recent_posts_with_thumbs {float: left;width: 100%;min-height: 70px;margin: 5px 0px 5px 0px;padding: 0;font-size:12px;}ul.recent_posts_with_thumbs li {padding-bottom:5px;padding-top:5px;min-height:65px;}.recent_posts_with_thumbs a {text-decoration:none;}.recent_posts_with_thumbs strong {font-size:10px;}</style> <script style='text/javascript' src="https://dl.dropbox.com/s/ercbfzxm41o63i4/NBTjQuery-scrolling-ticker.js" ></script> <script style='text/javascript' src='https://dl.dropbox.com/s/mzcmuhcas156xhx/NBTscrollingRP.js'></script> <script style='text/javascript'> var numposts = 10; var showpostthumbnails = true; var displaymore = false; var displayseparator = false; var showcommentnum = false; var showpostdate = false; var showpostsummary = true; var numchars = 100; $(document).ready(function () {$('#sai').vTicker({ speed: 500, pause: 3000, showItems: 3, animation: 'fade', mousePause: false, height: 0, direction: 'up' });}); </script> <div id="sai"> <script src='http://www.rohanmod.blogspot.com/feeds/posts/default?orderby=published&alt=json-in-script&callback=showrecentpostswiththumbs'></script> </div>


    Stylish Animated Recent Post Widget

    It is a animated recent post widget for blogger blog as blogger widget.this recent post widget shows thumbnails or images on the left side and post titles on the right side along with it shows the number of comments for the specific posts.best blogger widget in category ofanimated recent post widget with thumbnails.
     5 Type of Recent Post Widget Blogger Widgets/Gadgets
     5 Type of Recent Post Widget Blogger Widgets/Gadgets
    <script src="http://ajax.googleapis.com/ajax/libs/jquery/1.3.2/jquery.min.js" type="text/javascript"></script>
    <style type="text/css" media="screen">
    <!--
    #spylist {
    overflow:hidden;
    margin-top:5px;
    padding:0px 0px;
    height:350px;
    }
    .spydate{
    overflow:hidden;
    font-size:10px; }

    #spylist ul{
    width:350px;
    overflow:hidden;
    list-style-type: none;
    padding: 0px 0px;
    margin:0px 0px;
    }
    #spylist li {
    width:230px;
    background: #1ed2f2;
    list-style-type: none;
    margin:0 0 5px 0px;
    padding:5px 5px 1px 10px !important;
    -webkit-transition:all 0.2s ease;-moz-transition:all 0.2s ease;-o-transition:all 0.2s ease;border: 0 none !important;-webkit-border-top-left-radius:40px;-webkit-border-bottom-right-radius:40px;-moz-border-radius-topleft:40px;-moz-border-radius-bottomright:40px;border-top-left-radius:40px;border-bottom-right-radius:40px;
    }

    #spylist li:hover {
    background: #84f6f5;

    }

    #spylist li a {
    text-decoration:none;
    color:#4B545B;
    font-size:11px;
    height:18px;
    overflow:hidden;
    margin:0px 0px;
    padding:0px 0px 2px 0px;
    }

    #spylist li img {
    float:left;
    margin-right:5px;
    margin-top:3px;
    background:none;
    border:0;
    }

    .spycomment{
    overflow:hidden;
    font-family:Tahoma,Arial,verdana, sans-serif;
    font-size:10px;
    color:#262B2F;
    padding:0px 0px;
    margin:0px 0px;
    }
    -->
    </style>
    <script language='JavaScript'>


    imgr = new Array();

    imgr[0] = "http://i43.tinypic.com/orpg0m.jpg";

    imgr[1] = "http://i43.tinypic.com/orpg0m.jpg";

    imgr[2] = "http://i43.tinypic.com/orpg0m.jpg";

    imgr[3] = "http://i43.tinypic.com/orpg0m.jpg";

    imgr[4] = "http://i43.tinypic.com/orpg0m.jpg";
    showRandomImg = true;

    boxwidth = 255;

    cellspacing = 6;

    borderColor = "#232c35";

    bgTD = "#000000";

    thumbwidth = 70;

    thumbheight = 70;

    fntsize = 12;

    acolor = "#666";

    aBold = true;

    icon = " ";

    text = "comments";

    showPostDate = false;

    summaryPost = 40;

    summaryFontsize = 10;

    summaryColor = "#666";

    icon2 = " ";

    numposts = 5;

    home_page = "http://rohanmod.blogspot.com/";

    limitspy=4
    intervalspy=4000

    </script>

    <div id="spylist">
    <script src='http://dl.getdropbox.com/u/708209/scriptabufarhan/recentspy/recentpostthumbspy-min.js' type='text/javascript'></script>
    </div><a style=" float:right;font-size:8px; color:#3B78CD; text-decoration:none;" href="http://rohanmod.blogspot.in/2013/03/5-type-of-recent-post-widget-blogger.html">Blogger widget</a>


    Recent Post Widget With snippets and without snippets


    This recent post widgets has two variations first blogger widget recent post widget is with snippets or details of post and second recent post widget is with post titles only.both are very fast in loading.best simple recent post widget in category of blogger widget.
     5 Type of Recent Post Widget Blogger Widgets/Gadgets
     5 Type of Recent Post Widget Blogger Widgets/Gadgets
    <div id="hlrpsa">
    <script src="http://helplogger.googlecode.com/svn/trunk/recent-posts-with-snippets.js">
    </script>
    <script>
    var numposts = 5;var showpostdate = false;var showpostsummary = true;var numchars = 100;var standardstyling = true;
    </script>
    <script src="YOUR-BLOG/SITE-URL/feeds/posts/default?orderby=published&amp;alt=json-in-script&amp;callback=showrecentposts">
    </script></div>
    <div id="rpdr" style="font-family: arial, sans-serif; font-size: 9px;">
    <a href="http://rohanmod.blogspot.in/2013/03/5-type-of-recent-post-widget-blogger.html" target="_blank" title="Rohanmod">Recent Posts Widget</a> by <a href="http://rohanmod.blogspot.com" title="Recent Posts Widget">rohanmod</a></div>
    <noscript>Your browser does not support JavaScript!</noscript>
    <style type="text/css">
    #hlrpsa a {color: #0B3861; font-size: 13px;} #rpdr {background: url(https://blogger.googleusercontent.com/img/b/R29vZ2xl/AVvXsEg9h6i47lpfVI5qdQjrEp5U8OVYGMnPZ8IkUAGozNj99ZPgs7Khi9ed8X3TXu23jVOghayLrSpjSfYeRx_euIxaZu3q_NXOIx6-R3RmjkuaBgUqNUJvxmYBf2T4grCVHua6zoEbj-h1KYe6/s1600/blogger.png) 0px 0px no-repeat; padding: 1px 0px 0px 19px; height:14px; margin: 5px 0px 0px 0px;line-height:14px;}
    #rpdr, #rpdr a {color:#808080;}
    #hlrpsa { color: #999999; font-size: 11px; border-bottom:1px #cccccc dotted; margin-top:-10px; padding-bottom:10px;}
    .hlrps a {font-weight:bold; }
    .hlrpssumm {}
    </style>


    Recent Post widget without snippets

    <div id="hlrpsb">
    <script style="text/javascript" src="http://helplogger.googlecode.com/svn/trunk/recent-posts-with-titles-only.js"></script>
    <script style="text/javascript">var numposts = 10;var showpostdate = false;var showpostsummary = false;var numchars = 100;var standardstyling = true;</script>
    <script src="http://your-blog.blogspot.com/feeds/posts/default?orderby=published&alt=json-in-script&callback=showrecentposts"></script></div>
    <div style="font-family: arial, sans-serif; font-size: 9px;" id="rpdr"><a href="http://rohanmod.blogspot.in/2013/03/5-type-of-recent-post-widget-blogger.html" title="Grab this" target="_blank">Recent Posts Widget</a> by <a href="http://rohanmod.blogspot.com" title="Recent Posts Widget">rohanmod</a></div><noscript>Oops! Make sure JavaScript is enabled in your browser.</noscript>
    <style type=text/css>
    #hlrpsb a {color: #0B3861; font-size: 13px;} #rpdr {background: url( https://blogger.googleusercontent.com/img/b/R29vZ2xl/AVvXsEg9h6i47lpfVI5qdQjrEp5U8OVYGMnPZ8IkUAGozNj99ZPgs7Khi9ed8X3TXu23jVOghayLrSpjSfYeRx_euIxaZu3q_NXOIx6-R3RmjkuaBgUqNUJvxmYBf2T4grCVHua6zoEbj-h1KYe6/s1600/blogger.png ) 0px 0px no-repeat; padding: 1px 0px 0px 19px; height:14px; margin: 5px 0px 0px 0px;line-height:14px;}
    #rpdr, #rpdr a {color:#808080;}
    .bbrecpost2 {
    padding-top:6px;
    padding-bottom:6px;
    border-bottom: 1px #cccccc dotted; }
    </style>


    Recent Post Widget with thumbnails.

    It is most widely used recent post widget with thumbnails for blogger blog.you can see this recent post widget with thumbnails or images  in many websites and blogs.it is very fast in loading and attractive also.these are reasons why most of the bloggers using this recent post widget with thumbnails.  This recent post widget with thumbnails has images on the left side and post titles and descriptions below the post title.so it is covering every aspect of a post like image/thumbnails,Post title,Snippets/Description.fast in loading and attractive.A complete recent post widget with thumbnails.
     5 Type of Recent Post Widget Blogger Widgets/Gadgets
     5 Type of Recent Post Widget Blogger Widgets/Gadgets
    <div class="eggTray">
    <script src="http://helplogger.googlecode.com/svn/trunk/listbadge.js">{"pipe_id":"1a6640e2a78b2c6e736f2220529daae5","_btype":"list",
    "pipe_params":{"URL":"YOUR-BLOG/SITE-URL/feeds/posts/default"},
    "hideHeader":"false","height":"500","count": 8 }</script>
    <div style="font-family: arial, sans-serif; font-size: 9px;" class="ycdr"><a href="http://rohanmod.blogspot.in/2013/03/5-type-of-recent-post-widget-blogger.html" target="_blank" title="Grab this widget">Recent Posts Thumbnails</a> <a href="http://rohanmod.blogspot.com/" target="_blank">Blogger Widget</a></div><noscript>Your browser does not support JavaScript!</noscript></div>
    <style type=text/css>
    .eggTray {margin:10px 0px;padding:0px;}
    .ybr li {border-bottom:0px #cccccc dotted; padding:0px 0px 10px 0px!important;}
    .pipesTitle {padding-top:0px;}
    .pipesDescription {display:true;}
    .ycdr {background:transparent url(https://blogger.googleusercontent.com/img/b/R29vZ2xl/AVvXsEgoVuwHZp2nYVP86xxniFNxCdGZsurKZwgaL5p9xVlmQztXQuC9zm4E29_eVk9yYiFFLogYg3VShyphenhyphenMhdVZm72Q6nvpuQIHNDTG3l-epUI3yEramHzHI_Qq00Co4XjZlJDvzlGsdQZuT2KE/s1600/logo.png) 0px 0px no-repeat; padding: 1px 0px 0px 19px; height:14px; margin: 4px 0px 0px 0px;line-height:14px;}
    .ycdr, .ycdr a {color:#999999;}
    .widget .popular-posts ul {padding-left:0;}
    </style>

    Blogger widget customization

    Insert your blog url where YOUR-BLOG/SITE-URL is present. 
    Read More