In the past we have already covered how you can
setup a custom .com domain on blogger using cPanel but nowadays famous domain providing company provides you the ability to setup a custom domain with blogger without even buying a hosting or a cPanel. Namecheap is indeed one of the biggest domains providing company and most of the people trust them for quality service they offer. Therefore, today in this article, we will show you How to Setup Custom Domain in Blogger with Namecheap.
What is Namecheap?
Namecheap is a domain registering company that also provides you quality hosting. They are known for providing quality service whenever needed, they have 24/7 support that are always ready to help. Being a Namecheap customer myself, I have registered majority of my domains under Namecheap knowing they are seriously awesome at this business and that’s what everyone needs for them.
In case you don’t have a professional custom domain yet, go to
Namecheap and
order a domain it cost as low as 11$ per year while security guard free for 1 year.
What is Blogger Custom Domain?
When you create a FREE blog on blogger.com you usually get a .blogspot.com extension attach to your website’s address. However, if you’re creating a professional website you won’t like .blogspot.com attached to your website address. Therefore, you look prefer buying a professional .com domain for your company or a blog.
Setup custom domain with Namecheap in Blogger:
Setting up a custom domain in blogger is extremely simple and would hardly take few minutes to complete. The very first thing you need to do is to go to Blogger.com and login to your account. After logging in go to
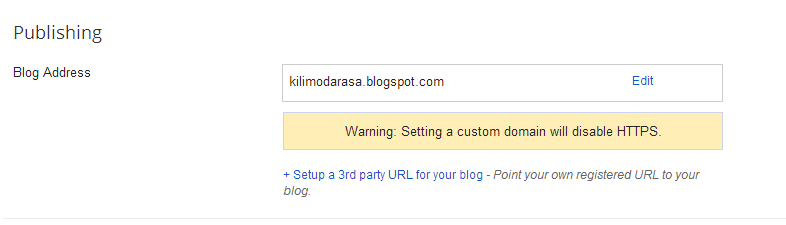
Settings >> Basics then you have to click on Set up a third-party URL for your blog text which is right under Blog Address field in Publishing section:
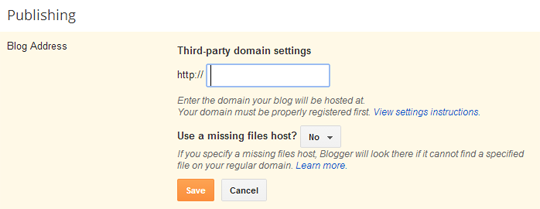
Now you the empty text are enter your website address i.e. www.mybloggerlab.com and click the save button which will then provide you the set of instructions you need to do in order to setup a custom domain with Namecheap.
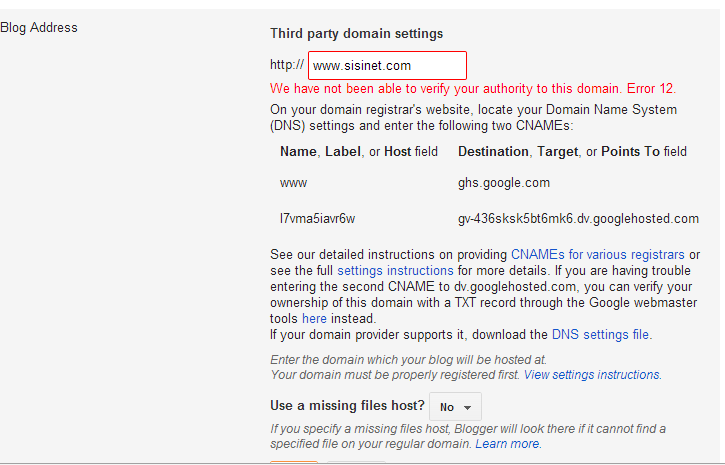
Upon pressing “
Save” button you will see two CNAME records that you have to add in your Namecheap account to make things work properly.
Go to
Namecheap .com and login to your account. After logging in select “
Manage Domains”
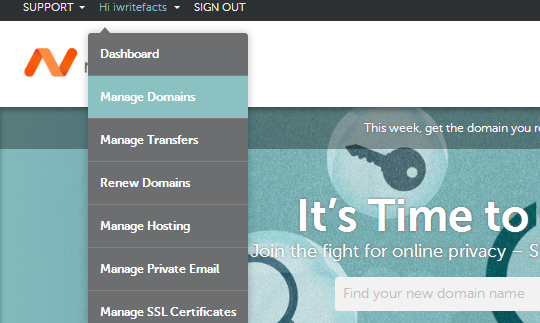
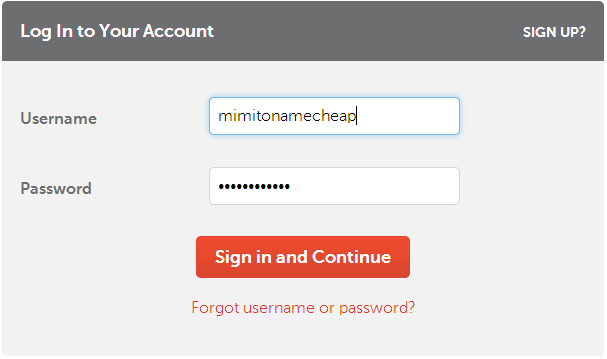
Login into Namecheap omain with your account.
Now you will notice a list of domains under your account, click on the one of the domain you would like to use it on your blogger site , and then click on
Manage button to open settings
A new page will load, now click on “ALL HOST RECORDS” that you are likely to find on the left menu.
Now
select CNAME as the type of the record and enter
www from blogger as indicated bellow into namecheap Host column, as well as enter
ghs.google.com value column, repeat the same for remained and Save changes.
After entering the first record head back to blogger where you can find a verification tag right under Name, Label, or Host field in "Host Name" field. Copy both of the verification tags, enter the first one in the HOST NAME field and the second one i.e. (xxxxxxxxxxxxx.domainverify.googlehosted.com.)
Note: Both of the records should be of CNAME type.
Once you are done with doing settings press
“Save Changes” on Namecheap.
Now get back to blogger and press “
Save” button again. If you added both the records correctly you will now be able to open your blog directly via your custom domain. All of your old post URLS will redirect to new post URLS so all your search engine rankings will remain the same.


